Computer Tutorials | Infotech | Software | Games | Ebook | Tips & Trick Blogger


Tips And Ways Of Easy Downloading

With the rise of free online downloading, anyone from around the world can gain easy access of their favorite music, movies and music videos, digital photos, documents or any file belonging from other people. As it turns out, nearly anything we do on the web includes downloading. For example, when accessing a web page, we are actually transporting the text documents, graphics, and everything that's associated with it. As the data reaches our web browser, it scans its file extension and if it's familiar with the type of file, then it will show its contents. Once it's done, we have the option to save it to our hard drive.

Things To Do Before Downloading

Downloading is fairly quick and easy, depending on the size of the file. With just a few clicks of the mouse, an internet connection and a running computer, it will allow us to get the specific files we want to download and save them to our computer. Although, files can be placed anywhere on the hard drive and in any folder, it is still advisable to create a new directory or folder on the hard drive for provisional downloaded files. It would be safer to create this folder under the C drive and with a folder name, downloads to locate the newly acquired files without difficulty.

How To Download

After the folder for the downloads is created, transferring the files to a computer is just a few mouse clicks away. Most web browsers have generally the same steps to follow when it comes to downloading. Once the file to be downloaded is located, clicking on the hyperlink with the right button of the mouse allows the user to do specific tasks. In this case, the phrase, save Target As or any phrase that has the same meaning to it should be chosen. The browser then automatically prompts the user which folder should be used to save it. The folder with the name, downloads, shall specifically be the container to all the downloaded files. To view the file, the user shall go directly to the folder with the name downloads.

Downloading is that simple. However, the computer must be equipped with at least an anti-spyware program in case a spyware comes along with the downloaded file. Extra precautions should be taken to minimize the risk of getting a spyware into the computer. Nevertheless, getting a file we want is worth the effort. Downloading is perhaps one of the most beneficial functions in the world of computers.

Top Mini Netbook Options Review

A mini netbook is a laptop that is specifically tailored for portability by reducing the size of the laptop without compromising on standards and features. The mini netbooks have become very popular especially for students and people who need to work as they travel. They come in a wide range of makes, performance and looks. Below is a review of 5 of the mini netbook options available in the market.

  • Lenovo Thinkpad X120 is one of Lenovo's top netbook. Though not as portable as the competitors offers, it comes with very powerful specs and it comes in a range of extra features. It comes fully loaded with extra USB ports, blue-tooth, voice and finger identification security, advanced web-cam, fully multimedia and so much more. The price of this model of mini Netbook goes for about $500.
  • HP mini 5 103 is the top HP mini netbook in the market. This netbook is fully portable with a slim body and great security features. The mini netbook also comes packed with a range of extras including a high pixel camera, excellent navigation pad, ideal for Window 7 and sufficient USB ports for computer based equipment compatibility. The only for this mini netbook is that due to ite small size, the display screen is pretty compromised.
  • The Acer Aspire One 522- BZ is one of the top Acer mini netbook. It is pretty compact and portable and comes with a fully loaded specs. It has a blue tooth, powerful camera and webcam, security features, high processor  speed and high capacity storage and comes ready for Windows7 professional installation. The other advantage of this mini netbook is that it is fairly priced. Its average market prices ranges at $330.
  • Toshiba Mini Netbook NB505 to NB508 are a quality range of mini netbooks. The main strength of these range of netbooks from Toshiba is that they have a long life battery that enables you to work long without power source. This really adds onto the portability feature. You need to be able to work through the long flights without power outs. The mini netbook range also comes in a wide selection of colors that especially attract the ladies. The draw back of this netbook is that it has a slow processor.
  • Samsung N210 is the mini netbook from Samsung. The netbook has a special designed screen that makes it easy to see and work even in areas with both bright and no light. Besides the light sensitive and auto adjustment screen, the netbook is also quite portable and is loaded with all standard and full multimedia specs.

If you are settled on purchasing a mini Netbook from a specific manufacturer, you can get it from local suppliers or from online suppliers  Online dealers may be a better deal to purchase since they come with a wider option variety option and the prices are more likely to be lower than those in the local computer shop. A thorough check on supplier needs to be done before you purchase a good online. You can never be very sure with online dealers. There are many cases of fraudulent online dealers especially for popular gadgets such as laptops and mini netbooks.

Enjoy Games On iPhone For A Better Experience


Virtual games know no age barrier. There was a time when video games were only meant for children, but the time dint stayed for long as no one can't really resist the fun and pleasure that video games, online games and mobile phone games can bring along. This craze towards virtual games have opened a vast path for game developers which has motivated them to offer few stupendous games that people get spellbound of.

J2ME is a software that makes easy to use compatible games for mobile phones and other wireless gadgets, and there is no issues for the developers to contrive games for iPhones as well.

iPhone game development is a popular practice among developers these days and this market is growing tremendously after the launching of iPhone and its later versions. There are dedicated companies which are indulged in formulating iPhones' games and they are offering games like puzzles, quizzes, war games, racing games, block games, numbers games and lot more. Developing a game was a big deal earlier years, but on iPhone it's just so easy by using its SDK (software development kit).

There are dedicated companies which are indulged in formulating iPhones' games and they are offering games like puzzles, quizzes, war games, racing games, block games, numbers games and lot more. iPhone game developers can cater to a vast socio cultural sphere as these days iPhones cater to large section of people. So there will be no restrictions on anything and developers can offer an array of games.

Tips: Troubleshooting for Laptops

Knowing how to do simple troubleshooting techniques is very useful for computer users. It can save you not only money but time as well. However, it's confusing how to deal with computer problems if the main cause cannot be determined. For instance, LCD issues can be caused by glitches in the video adapter or mainboard or a bad inverter. If you thoroughly read a laptop troubleshooting manual, you can know detailed procedure in solving this problem.

If the LCD has minor problems only, it won't be necessary to replace it yet. Major problems which require LCD replacement are dead pixels and cracks on the screen. Although laptops have different brands, most technical glitches are almost always similar due to similarity in structure and design; hence, similar troubleshooting approach is applicable to most laptops.

The first thing to do in troubleshooting laptop glitches is to identify the cause or reason. If the problem is related to power failure, then the power supply should be properly fixed. Check the power plug and connect it correctly. Also, check the LED and battery. Ensure that the power switch and main-board supply are working well. If you're experiencing troubles with an easily exhausted battery, you can try adjusting the power saving mode to save energy while using the laptop. Adjust the screen brightness so that the battery doesn't easily get drained.

For video failure, the first step is to check the power supply. Also, some problems may be due to power failure from the main-board. To check if the internal video adapter is working properly, try connecting an external monitor using a standard VGA. Check if the monitor emits light. If it doesn't, the problem may be related to internal disarray of physical connectors such as modem port detachment. However, if the external monitor lights up but shows dead spots and columns, then it implies that your laptop ahs a poor LCD assembly. There could also be problems in backlight and inverter failure.

If your laptop does not start up nor turn on, check if it's plugged correctly to an AC outlet. Ensure that there is enough power provided by the outlet. If it turns on but the screen shows nothing, you may have to check if your video card is faulty. Replacing the video card may solve the problem.

Run a full virus scan regularly to identify and remove viruses and spyware. Keep your antivirus and antispyware programs updated for optimum protection. Your computer's firewall should also be turned on.

Download Home Photo Studio 2.71

Powerful and easy-to-use photo editing software! Home Photo Studio is powerful and easy-to-use photo editing software offering a complete set of image manipulation tools. Thanks to a convenient interface and a detailed help system, the software is simple to learn but provides enough options to keep any photo enthusiast creatively occupied. With Home Photo Studio, you can view and edit your digital shots. Photos can be retouched, color can be enhanced, red eye can be removed, and blurred images can be made clearer. All of these changes can be made with a click of the mouse!

You can add special effects to your photos, including lighting, weather effects, and even 3D composition - a feature not commonly found on non-professional photo editing software. Frames in a wide range of styles can be added to the photos, as well. When the photos have been enhanced, they can be used to create slide shows, postcards, and collages, which can be shared with others.

This photo editing software includes hundreds of special effects, design templates, and project options that can be used with digital photos on computers. If mistakes are made during the editing or enhancing process, the multi-undo feature makes correcting the error easier.

Additional features found in the software including the ability to quickly view EXIF data and to use plastic effects on photos. Users will appreciate the detailed help system built into the program so they can find answers when having trouble with a new project. Home Photo Studio provides all of the features and extras needed to modify and enhance digital images.

Features:

· Support 20 input and output graphic formats.
· Fast and easy-to-use Image Explorer.
· Enhancement of low-quality digital photos.
· Support adjustment of Levels, Curves, Color Balance, Contrast, Saturation, etc.
· Wide range of available effects for creation of unique art photographs.
· More than 100 photo frames and mask effects.
· All-around technical and sale support.

Homepage - http://ams-photo-software.com/

Download: Home Photo Studio 2.71

Making Your Internet Browsing Better

There are a few ways that you can really ramp up the efficiency of your Internet browser to make your experience of surfing the net all the more enjoyable. Here, we've listed our top tips for making your Internet experience better. From using the right anti virus software purchased from a reputable Business IT Support company to ensuring you scan downloads before proceeding, we've got a list of simple tips you won't want to miss:

* Choose the right Internet Browser: Some browsers require more RAM from your computer than others. Try to find a browser than requires less and provides you with faster speeds. Google Chrome is currently one of the fastest browsers amongst them all.

* Don't overload your Web browser: It's a good idea not to open too many tabs at once whilst browsing the Internet. When you are looking at multiple pages moving from one tab to the next you will find that your Internet slows down. You can prevent this by only having one or two tabs open at once to ensure that your browser is not overloaded and begins to slow down.

* Scanning downloads before they happen: There are many free and paid for scanning programs that evaluate web pages for you before downloading any content from them. It is good to go through this process every time you are unsure about a particular page. This is the same case for emails. Many free emails have scanning tools you can use that will scan attachments for you before you download them to make sure they are free from viruses.

* Scan your computer regularly: By keeping an eye out for virus's and spyware that can affect your computer you are also ensuring that you are helping to keep your Internet speed at its optimal levels. Spyware and other things like virus's can really slow your Internet speed down.

* Get the right advice: If you are unsure about something on your Internet browser ask someone who will know about it and will be able to give you the correct answer. A colleague in the IT Department for instance.

* Keep your anti virus software up to date: Not only do virus's slow your computer down but they can also affect your Internet access. Make sure that your virus software is constantly updated because the healthier your computer is, the better experience you will have whilst surfing the Internet. If you are unsure of how often to update the software you should simply call the IT support department from the company you bought the software from.

There are a few simple steps you can take to ensure that you are getting the most out of your Internet browser and Internet experience in general. I hope our tips on how to optimise your experience and Internet speed has given you some ideas on how to improve the way that you are currently use the Internet in your home.

How to Fix Audio Card and CPU Complications in Your PC

There are numerous component issues experienced by PC users every day. You might have previously experienced a few of them. If the issue relates to sound card or CPU, this post could possibly offer you ideas how to troubleshoot these types of issues.

Audio card issues are extremely typical. If you discover out some day that a computer system produces no audio when you make a recording, tune in to tunes or watch movies, there has to be some issues with the computer audio card. Normally, most audio cards are inexpensive but for anyone who is an audiophile who's meticulous with the audio quality, then it could be a bit tough to replace your high priced audio card.

In order to troubleshoot audio card issues, the very first simple move to make is, obviously, examine the speaker wires to determine if they are linked and plugged on the right places at the audio card. Also, check the power wires of the speakers to determine if the power supply is okay.

Next, verify the windows volume. It should never be muted. Wave and playback volume also needs to be turned up. Uncheck the Sophisticated Controls for Playback Controls for those who have "Digital Output Only." Looking at this occasionally results in no sound troubles.

In the event that none of these do the job, reinstall the audio card drivers. Do not forget that drivers must always be up-to-date so they will remain very suitable for your PC system. Nonetheless, if you nevertheless encounter no-sound issue, you might have to swap your audio card with a brand new one. The situation may be linked to the bond of the sound card to your motherboard.

The CPU is very substantial to the effective functioning of your PC. It does all needed calculations to run the computer system. If your CPU becomes faulty, there might be several factors: it could be overheating; the BIOS or jumper setting may very well be messed up; it's overclocked; it is not placed properly; and the high temperature sink may not be linked to the motherboard and CPU. Hence, you ought to check if these causes the situation. Heat sink should be tightly attached. Read the owner's manual for the motherboard. Make certain that all jumpers are set appropriately. See to it that this heat sink cools off the CPU. Maybe you have to order a brand new one in the event the heat sink does not work properly.

Most of these tips need to eliminate your issues but if none of them meet your needs, then the next best solution can be hire a pc expert to test your computer and carry out specialized computer restoration.

GIF Banner Designing Tool and Its Features

Finding a nice GIF Banner designing utility is not difficult now a days. The best thing about animated tag makers is that they comprise various effective elements. These add to the look of your tag, making them more effective. Majority of tools have the simple drag-and-drop functionality in them which makes it easy for users to create such streamers. These utilities let you get output in GIF technology. Let us see what different features are there in these tools.

a) Character map and arc text option- For the curved effects to be given in text, the arc option is the one that you can use. Many programs have this option. Character map functionality shows characters for a font which you could insert in your design.

b) Library to choose background- There libraries in these tools are from where you can select either animated or static background. It is best to infuse both the styles. The reason behind not using a completely flash design is that some people might have problem in viewing. This is so because if a person does not have a Reader installed on system, then anything created with this technology will not display.

c) Image addition- GIF banner maker that does not have this option will fail to offer its user complete freedom of creation. This feature helps in inserting image in any object selected. Along with an image, you can also fill a symbol, text and different shapes.

d) Different shapes for background- Rectangle, Round Rectangle, Ellipse, Diamond, Hexagon, Octagon, Star and Semi circle. These are some of the shapes you could choose for the background.

Apart from this, there are many other functionality that you would find. There are many templates in them too. These are particularly helpful for the starters, who may never have created a pattern for a streamer. Size of a banner holds a lot of importance. This is particular when they are to be placed on websites. In these software products, you will find various sets of sizes to choose for your tag. Proper alignment and measurement of the pattern is necessary so that the look seems to be aptly balanced. For this, there is a feature in these utilities which is 'Ruler'. Measuring of the tag becomes easy and elements can be aptly placed. Also, along with using animation in the background, the text can also be created in animated form.

9 Tips To Check Your Internet Connection

Certainly one of the optimum ways to speed up your internet is to also clean up your computer. A fast internet connection is decreased substantially by a slow computer.

Among the BEST ways to speed up your internet is to assess your internet connection. There are numerous ways that you can strengthen your internet connection and listed here are my 9 top ways to speed up my internet by merely checking my internet connection.

Presumably some of them will work for you

1. Check Your Internet Connection in your Location. Many times ISP’s enhance their service and have speedier connections available then the one that you are on. I recently upgraded my Qwest connection from 12 Mbps to 20 Mbps and in the same instance decreased my monthly cost by nearly 40%. There are deals out there, just call and ask.

2. Optimize your temporary internet files and cache. The temporary internet files and cache effectively are developed to make surfing faster by storing a local copy of the file (images or graphics for example) in the suitable file on your system so that next time you view the website you will not have to download it again. To enhance the use of these folders, do the following: Start up Internet Explorer, then click on the “Tools” menu at the top and click on “Internet Options”. On the General tab, click on the “Settings” button next to Temporary Internet Files. Put a check mark for newer versions to handle downloading new versions “Automatically”. Set the amount of disk space to use to 2% of your total harddisk size or 512 MB, which ever is smaller. On Firefox, click on “Tools” then “Options,” and go to the privacy tab. Then click on on the Cache tab inside of this to set it to automatic.

3. Inspect for Wireless Router issues with wireless phones. There are 3 types of wireless routers; 802.11 b, g, and n (2.4Ghz) or 802.11 a (5.8Ghz). Check the connection of the wireless phone and if you have a 2.4Ghz Cordless phone and 2.4Ghz Wireless router then you will endure a slow down, particularly when using the wireless phone or cordless security camera gear. The most simple way to check the phone and camera is to simply look at the spec sticker on the side or back. If it says 900Mhz then it’s fine. If it says 2.4Ghz or 5.8Ghz then it could be the source of your slow connection speed while they’re in use.

4. Restart Your Network. In regards to rebooting the home network, sometimes all it takes is restarting the router and/or modem that you have at your home. Try removing the power and wait around 10 seconds or so then connect it in again. You will probably see a boost in your speed. One fast way to check your internet speed is by performing a quick (free) ISP test at www.speedtest.net.

5. Upgrade equipment like the firewall and routers. The newly released routers are far more capable then older routers and are able to handle the quickness of modern networks. Almost all old routers are not capable to handle speeds faster than 10 Mbps. They also may be underpowered and too weak to reach capacity. It is advisable practice to invest in a new router every 1-2 years.

6. Upgrade your router firmware. It is generally useful to check the status of the most recent software updates to your router. It is excellent business practice to investigate the website from time to time to confirm that you have the most updated version of the router firmware software. Most routers have built in software to check, but it also isn't going to hurt to monitor it again.

7. Replace your old cable modem. There are any number of reasons to replace the old cable modem. As with all electronics, they deteriorate and wear out over time and the modems and routers simply wear down. As your modem gets older, it will have to utilize more resources to keep up with increased connections. Every solid-state electronics will degrade over time due to built up heat damage. Your broadband modem will have a harder and harder time ‘concentrating’ on sustaining a good connection as it gets older (signal to noise ratios will go down, and the number of resend requests for the same packet will go up). An after-market cable modem as opposed to a cable-company modem will oftentimes offer a better connection.

8. Close unneeded programs that are operating with the Task Manager. Simply hit the “ctrl”, “alt” and “del” keys concurrently and the “Task Manager” will show up. under the “Applications” tab, simply shut down any programs that are running that do not need to be. Also under the “processes” menu, you can shut processes that you have opened from time to time. Chances are good that there are many processes that you need running so educate yourself on those most used processes before closing them down.

9. Ensure no one else is prowling your network connection. Your connection should continually stay secure. Each network is a little unique so it makes no sense that I go through what you need to do to secure your internet other than to say – read the owners manual on the router. This one strategy will help you speed up your internet.

Brandon has been in the tech industry for over 12 years. Check your internet connection by adhering to these tricks above and watch how I speed up my internet and get additional free tips at my website.

Removal of Adware Software

An advertising-supported software, or adware as many knows it, is basically a type of software that shows advertisements of certain products, services, or a website on your PC's. Besides it being annoying, there are many problems that it can also give to your computer. That is why removal of adware is very important. I will also be introducing a high quality anti adware and spyware software that speed up my PC significantly.

Some of the damage or bad effects it can bring to your computers are slowing of your browser, pop-ups that suddenly shows, problems with your internet connection, and the worst, it can also infringe your privacy. There are some signs that you should look for to see if your computers are affected by adwares or spywares.

The most common signs that you would easily see are, sudden slowness of the whole system. Some also makes you land on an unknown site different from what you searched. Your default internet browser suddenly changed. You will also notice that every time you open or start your PC, an error sign often shows up.

If you noticed some of these signs, it would be good to check immediately if indeed you are infected. The first step that you will need to do is to always update your computer, most importantly the security updates. Then download an anti-virus or anti-malware software, there are free or trial versions but it would be wiser to buy them to get the most support they can give.

Keep in mind though that every day, different kind of viruses, malwares, and adwares are created. So choose the best anti-malware you could possibly get. Study the capabilities first or ask other peoples referrals, if they knew any great software for fighting adwares. If you already have this, it would be a good practice to regularly scan your computers, if at all possible, use a full system scan.

Always allow your anti-virus to check updates and you can also automatically download these updates to be easier. Keep them in a single file or folder so you can easily find it. Also remember that when you are using any of these adware removal softwares, it is best to do it in safe mode to be sure your computer or even your important files will be protected if ever something bad happened.

Removing these adwares can be tricky, but generally doable. Learning more about them is very important and is your responsibility as the owner of the computer. This is essential for your computer's safety and also your privacy and peace of mind too. I am glad that all the spyware, adware and viruses on my computer are all gone now all thanks high quality software which I downloaded and would highly recommend it.

PlayStation Portable (PSP) Popular Action Games

Hand-held portable devices are day by day gaining viral popularity because of fast running lifestyle of people, where they hardly get time to sit at home and enjoy their favorite games. It is not only popular among people who don’t have much time but also for gaming freaks who don’t want to miss daiy entertainment wherever they go. From all genre action games are most popular that’s why we are mentioning few popular one for PSP console.

300: March to Glory

True Spartans only religion is to die for blood, glory to die in battlefield until death or to win the battle. Massive action game generates adrenaline rush in your blood to fight against Persian army to defeat them in hell battle full with strong action. King Leonidas who is the leader of Spartans leads his soldiers against vicious King Xerxes who wants enslave the people of Greece. Somehow doing justice with movie and novel game is extremely violent, interesting but lacks badly in controls.

Aliens vs. Predator Requiem

Years ago Predator or Aliens movie given not so good result on big screen but it’s still interesting to see club of both action science fiction favorites in transformation of game. Game focus is more on predators rather than humans, where predator tries to hide their existence from humans. Those who have seen both movies can found the gameplay is little weak and also game is quite easy to play. This multiplayer has better graphics, gampplay and sound with well represented predator warrior.

Bounty Hounds

Bounty Hounds is third person shooter role playing game developed XPEC for PlayStation portable. Game raises your excitement to prove yourself as a bounty hunter while traveling through whole solar system. On this dangerous mission you can speak to anyone coming across your path for moving intelligently in the game. The game offers more than 500 weapons and armors along with spectacular visuals to present story effectively.

Call of Duty: Roads to Victory

Call of Duty: Roads to Victory is first person action shooter game and has three different campaigns to play with variety of fun level. Roads of victory never let you down in terms of graphics even though it’s a PSP game but will give you console like war footage. Unlike other PSP games sound effects are tremendously good with brilliant voice act. In the game few levels are quite easy and some are highly difficult, so overall the game has medium difficulty level for players. With the help of Ad hoc you can hook up with other gamers for multiplayer game fun.

New Dell Inspiron R Laptop Series

Laptop computers are now taking the place of desktops for lots of people for their portability You will find there's simple reason why, because the desktop is gradually becoming outdated, consumers are choosing laptops. With the size of notebook computers and also laptop computers they can be used wherever you go. Men and women like taking their particular laptop to their favorite location to do their work as well as studies.

Even though many laptop computers include different features, the Inspiron R laptop by Dell is really a laptop which is perfect for you. All your data files are incredibly easy to access. Along with the internal wireless connection, sharing your data files with other people is very simple. You can watch dvd's in surround sound and even video chat together with the incorporated webcam. For people that like a compact, very portable laptop, there is a 14 inch design. Of course everybody is always searching for different features for their laptops so we will cover some of the features this computer has. Inspiron R offers time savors like Dell Dock, that places frequently used apps towards the top of the screen for finding them faster. One more excellent feature which is an optional feature has to be that you can project everything you have on your laptops screen directly on to a HDTV with out using any wires or cables. This is accomplished with the Intel Wireless Display. One more option would be to invest in any version of Microsoft Office and have it installed in advance. The various designs all include the following options. Every model comes complete with Windows 7 pre-installed. Let's not forget the image quality, each and every model comes with high definition resolution. Additionally you can pick exactly what color you want, the color options are pink, blue, red and black, pick a color that matches your mood. Of course each and every laptop includes wireless Internet connection. With the aid of a wireless TV adapter it's also possible to display your display screen on your HDTV.

A stereo surround sound stage that will be provided with SRS Premium Sound. Photo and video files are transferred swiftly with built-in media card readers. Realistic video effects along with optional 1GB ATi graphics. Select designs have as much as 640GB computer drives. Yet another great feature about this particular laptop computer is the integrated scrolling along with the touchpad. Together with prices starting at $449, the Inspiron R by Dell is the laptop for you.

How to Increase Your Website Traffic Rankings Using Social Media Marketing

There are plenty of ways you can use social media to market your products or services online. I would stay away from MySpace unless you're in the entertainment industry. Outside of that, Facebook is the best choice.

Stay away from Twitter unless you are doing multiple promotions or frequent updates. I still can't figure out all the hype with Twitter, although I'm currently using Twitter - go figure!

Linked In is good for networking with like minded business people. You can answer and ask questions. Answering questions at Linked In will establish credibility, trust, likability and you can be perceived as an expert in your field. Doing this can allow you to build relationships that may lead to joint venture partnerships. So, no matter your market, join Linked In.

Join forums that cater to your market. This is a good way to get you and your product in front of the people who matter most, your target group! Just go to Google and type your "keyword" followed by "forum and message boards" and see what comes up. I can bet your bottom dollar there's a forum for your target group!

YouTube is good too! Okay the simple way to make videos for YouTube is to write a 300-500 word article. Record your voice as you read the article out load. If you have Microsoft open Movie Maker and add your recording and then add pictures that compliment your recording and you have a video slide show to upload to YouTube. If you use a Mac just open up iMovie to make your YouTube videos.

You can also create Squidoo lenses and HubPages. These sites are good for doing affiliate product reviews, product comparisons or simply doing a tutorial of your own products or even your affiliate products. The reason I like Squidoo and HubPages is because Google loves them! Their pages get indexed quickly in Google.

There are all kinds of other methods like social bookmarketing, RSS feedsScience Articles, blogging and podcasting just to name a few. Just simply pick which methods will work for you TODAY and stick with your plan.

Find Up-To-Date Drivers For Your PC

Updating driver software is an important but often neglected part of computer maintenance. Drivers are programs that allow your computer to communicate with all the different parts inside and outside. Your computer has several disk drives, cards, and other internal components that are not part of the basic motherboard and processor. You also have a monitor, mouse, keyboard, and possibly a printer, webcam, and other peripheral devices. Each of these pieces is made by a different company, and they do not automatically know how to work together. Fortunately, each device has a software program called a driver that tells your computer how to find and use that device. Some drivers come on disks with the components, and others are downloaded from the manufacturer's website.

Your computer's operating system gets updated on a regular basis, either automatically or manually by prompting you to download and install updated software. These updates provide important bug fixes, security improvements, and other helpful things that improve the operating system. This means that your operating system changes over time. The original drivers for your components are designed to work with a specific version of your operating system, and as this software changes the drivers are less functional. Driver software also has updates, but these must be acquired from the device manufacturer. When all your software is up to date, your system can function at peak performance.

Updating drivers can be done without any special programs or materials. All you have to do is open Windows Device Manager and then look for out-of-date drivers. Then you need to find the manufacturer's website for each driver that needs to be updated, and then download and install that driver software. It is a very good idea to make a backup copy of your drivers before you update them. If something goes wrong with the installation, or the new driver does not work, you want to be able to restore the working version of the driver software right away.

If you are not confident handling this task by yourself, you can have a technician do it for you. Professional computer help is usually effective but can be expensive. Another option is to get a driver update program. A good updater will scan your device drivers, at regular intervals, and let you know if they are out of date, if there is a newer version available, or if there is a problem with the driver. Some programs also allow you to make backup copies of driver software.

6 Valuable Strategies To Safeguard Your LAN From Natural Disasters

Protecting your LAN is easier than you imagine and it assures the protection of your information. There are many strategies to guard your information like preparing various plans for different disturbances, providing internal back-ups, utilizing off-site back ups, rotating between back up internet sites and developing live mirrors.

Natural calamities range from the normal run of the mill storm to large snowstorms which have the ability to cut energy supplies and essentially put a standstill on your everyday routines. Using a system to guard your local area network from all of these possible disasters is truly essential to ensure that your mission critical data keeps intact.

1. Utilize appropriate LAN care in your enterprise

Modern businesses now depend on fully digital systems and while this gives the owner essential efficiency and effectiveness, using a comprehensive IT program has its own restrictions as well. Prey to numerous disasters, a terrible storm can destroy all critical information from the program if a right back up plan is not set in place. It is essential to enforce a strict plan to protect your lan magnetics before calamity hits.

2. Prepare a different plan for different calamities

Different disasters with varying intensity could strike at any time. This potential leads to the necessity to prepare a unique set of plans to deal with the many obstructions. A bad snowstorm that can eliminate all power supplies for days on end, might cause less damage compared to a bad thunderstorm which could cause computer hardware to short circuit, making them obsolete. It is important to keep your recovery plan is adjustable to cater these various needs so that restoration can occur speedily with the least potential disturbance to business dealings.

3. Provide interior back-ups

It is important to constantly make back-ups when running a business or databases. Crashes to the program caused by a simple power blackout can lead to terrible effects, particularly if details are lost and cannot be restored. Using internal back up hard disks and software make sure that you won't lose your computer data and make restoration fast and efficient during a power blackout. They also function as good organizational and management plans.

4. Make use of off-site back ups

External servers and online backup is another factor to think about to protect your LAN from natural calamities. Sometimes it is tedious to manually update your files. Computer software is now available which automatically updates any information on your system to an off-site or external server. This ensures that your data remains secure and in case of any disasters, you can rest assured that you've an up-to-date copy of your data somewhere safe.

5. Rotate between backup websites

The old saying of not putting all of your eggs in a single basket is also applicable here. Vital information should not be stored in one location. Instead, put duplicates of your back up in several locations. This would ensure that even if 1 computer goes down, there are still copies of your information somewhere else in easily achievable web-sites.

6. Make live mirrors of your records

Developing live mirrors of all your information ensures that you have several copies of them in different locations. High speed servers can be used to create mirrors that are precise duplicates of your files in several internet sites. In cases like this, your data can be recovered easily in the event that one of your drives fails. Again, it is best to load your essential data on reliable servers. In all things, it's vital to keep in mind that it is always better to be secure than sorry. Natural disasters can't be avoided. However, disastrous effects can be minimized and avoided with the proper precautions.

Firefox 4 browser Download Record


Mozilla’s new Firefox 4 browser was downloaded twice as much in its first 24 hours as Microsoft’s Internet Explorer 9 on its first day.

Some are speculating Microsoft’s decision to keep IE9 off its 10-year-old Windows XP operating system may be helping the multi-billion dollar company’s biggest competitor — a self-described non-profit organization — in the web browsing market.

Firefox 4 picked up about 5 million downloads on day one, according to Geekwire.com’s Tom Bishop, and had nearly 8 million by Wednesday morning.

But it’s Google Chrome that Mozilla Firefox is really competing with.

Firefox once owned an all-time high 47.9 percent of the browser market, back in July 2009, or a month after the release of Firefox 3.5. Back then, Internet Explorer and Chrome owned 39.4 percent and 6.5 percent of the market, respectively. Fast forward to today and you’ll see that Firefox and Internet Explorer have both dropped substantially, to 42.4 percent and 26.5 percent, respectively. Chrome, now with 24.1 percent of the market, has experienced an astronomical rise in usage.

(Lesser used browsers Safari and Opera have for the most part maintained four percent and 2.5 percent shares of the market, respectively.)

With Firefox 4 out in the wild and doing well, Chrome isn’t sitting idly by.

The latest browser market-share stats, from just before the release of the new browsers, put Internet Explorer at 56.8 percent, down from 68 percent two years ago. Firefox has held relatively steady over that period, but the big gainer has been Google Chrome, which rose up from practically nothing to now boast nearly 11 percent of the worldwide market.

But keep in mind that Microsoft is voluntarily limiting its market, not only by making Internet Explorer exclusive to Windows but also by declining to make the new browser work on Windows XP. Even though Windows XP is nearly 10 years old at this point, more than 40 percent of Internet users are still clinging to it, putting IE9 at a disadvantage in the numbers game by not supporting XP.

Firefox, in contrast, continues to support Windows XP. Mozilla knew coming in that it would have a built-in advantage, based on Microsoft’s choice to support only the newer Windows Vista and 7.

“That’s a decision that they get to make, but it sure did surprise us, because the best metrics that we’ve got say 40 to 50 percent of the web is still on XP. That’s too big for us to just leave them behind,” said Johnathan Nightingale, the Firefox engineering director, in a recent interview.

To be sure, Firefox isn’t squeaky clean. In recent years, more than 80 percent of the Mozilla Foundation’s income has come from Google. The nonprofit has been accused of changing features in Firefox, under pressure from the advertising industry. But of the big three, only Firefox stands a chance of remaining somewhat independent, a voice for customers, not advertisers.

Download: Firefox 4

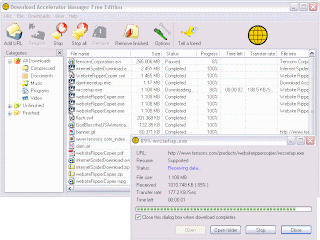
Download managers accelerators : Quick tips to increase your Internet Speed

Getting an Internet connection is one thing and getting a speedy Internet connection is another thing. Increasing the Internet speed is not a big task, as it can be increased through a number of easy steps. Read on to acquaint yourself from the various effective tricks of increasing your Internet speed.

The first and the easiest way to increase your Internet speed is to close or remove all the programs that could be using the Internet. You may not know, but things like MSN Messenger, Skype and AIM are some of the tools that can slow down your Internet speed tremendously. So, a shortcut to increase your Internet speed is to remove these things or close them for a while. For this you can simply go to Start and then to Control Panel and Add/Remove Programs.

Another useful and quick tip to increase your Internet speed is to re-install some programs that you are using. Sometimes, certain programs do not run correctly on the system thereby, making the Internet speed slow. The best way to deal with such a problem is to re-install such programs on your system.

Next you can look at using internet speed optimization software which use advanced algorithms to quicken up your internet speed. You can find a bunch of such software by visiting our section network tools. Moreover if you are looking to increase your download speeds then it would be prudent for you to check out popular download manager applications which use compression and route variance techniques to improve the speed of downloads. A number of such software can be found in our section on download managersand all you need to do is to select a tool appropriate for your need.

Google Android 2.2 Tablet PC

The Android operating system has become very popular since Google started using the Android OS in its phone. Back then, Android 1.6 was used. However, a lot of advancements have been made, and thanks to the rapid changes in technology, Android 2.2 is now available to users. Previously, Android could only be used on phones. However, thanks to the rise of tablets, people have switched from using standard sized phones to much larger tablets that are able to incorporate a lot of different other options in them as well.

A Google Android 2.2 Tablet Pc has a lot of different options that can be easily used by anyone. The tablet runs on the latest Google Android 2.2. The new Google 2.2 Froyo builds upon its previous version, which is the Android 2.1. The large 8 inch screen allows users to easily navigate through the menu and change the layout as per their wishes. There are four different home screens that can be easily modified with new widgets and icons, giving you complete control of your tablet. Similarly, from the Android Marketplace, you can easily download a variety of different applications on your Google Android 2.2 Tablet PC.

If you are looking to buy a cheap Android tablet, there are several places from where you can get them. Search online to find good deals on a cheap Android tablet, as there are many available. However, make sure that you get the latest Google Android 2.2 Tablet PC, as there is a marked difference between the speeds and processing of the latest Android tablet as compared to the older models. The new features available in Android 2.2 allow you to modify the menus as well as the home screens. Improved processing has made the operating system much faster to use, and you would find lesser loading times as compared to the previous versions.

One of the most notable advantages available in the latest Android 2.2 is that it allows you to use your Android reader as a Wifi Hotspot too. This means that if there is a Wifi connection nearby, you can easily connect your Google Android 2.2 Tablet Pc to it and start rerouting the connection so that other users can also connect from your tablet. If you are looking for a good cheap Android tablet, you need to search thoroughly to make sure that you find the right tablet, as there are always chances that a secondhand tablet might be faulty.

Lcd Or Plasma - Which Is Best For Your Digital Signage Display?

In today's world of digital signage is a debate which is the best choice of screen - LCD or plasma.

There are many factors summarized here, including the performance and cost that will determine whether to choose LCD or plasma for your digital signage display.

Mechanics

Selfserviceworld.com described in the January 2007 article on the differences between LCD and plasma non-specialist competence. Overall:

LCD is composed of two sheets of transparent material is polarized, one of which is treated with a polymer containing liquid crystals. Crystals interpret the electrical current and control the light that passes through. Fluorescent tubes behind the crystals to produce light that passes through to the viewer. The crystals do not emit light on both the LCD display uses less power than other displays.

Plasma displays use glass coated with bubbles of ionized gas containing red, blue and green subcompartments. Phosphorescent coating is applied to the glass and when electricity passes through the plasma emits ultraviolet rays, which show the corresponding color.

Performance

Oft-cited concern is the burn-in plasma screens. Depending on what you read, burn-in is a serious problem or whether it is small, which can be easily remedied.

Burn-in is a term used to describe the static images, which become permanently visible after being displayed for a long time. Burn-in is not only a question of LCD displays can become a problem plasma. Burn-in is becoming less of an issue, because companies are using digital signage display some simple techniques for avoiding it: the images are rotated frequently, using more motion and reducing the contrast and brightness levels.

Lifecycle is another problem. LCD had a longer life at a time, but the average lifespan of LCD and plasma are about the same now, which lasts about 50,000 hours each.

LCD units are lighter and consume less energy, factors which may affect your decision.

Contrast ratio (the difference between black and white) are much higher in the plasma, resulting in a clearer and brighter picture. Plasma screens, video images and fast motion better than LCD, and offers a wider viewing angle, which may be important for retail environments.

Cost and Size

The determining factor between LCD and plasma, it is often the price. With large-format LCD prices dropping, the cost is becoming less of an issue.

Size is an issue that ties in with the flow, because it has its own budget, which could ultimately determine the size of the screen to choose from. Plasma is generally available in larger sizes, although this is becoming an LCD get bigger. Plasma does still tend to carry larger displays - digital signage display designers prefer to show more than 50 inches.

How did you decide to Digital Signage Display Format?

Both LCD and plasma offer incentives, depending on your needs. When deciding on your digital signage display, you should take a good look at your budget and factor in the size of display needed

Dell Inspiron M101z Laptop Review

Netbooks are the most compact platforms to carry out your computing tasks. There is a list long of offering made by Dell that are highly improved and much advance than what was offered by the brand prior to these.

It is a noteworthy fact that dell laptops have never been disappointment for the buyers. Certainly, this is the reason, why the new Dell Inspiron M101z has received a warm welcome from laptop lovers. This is probably the most viable investment option for you if you are thinking for a switch in your old and slow performing computing kit. This kit has been packed with more than double the graphics and capabilities ability and signifies greater strength. Being lightweight and compact in size, the new Dell Inspiron M101z price is decided after considering the low budgets of the buyers.

This device has been integrated with a bright 11-inch screen which is coupled by dual-primary processor of 4 GB of RAM. Further, it has been integrated with images card that's capable of 1080p High definition. The most crucial aspect featured by this It's really hard drive is in the 7200 rpm 320 GB flavor, along with the webcam which has a normal 1.3 megapixel. From the connectivity standpoint it is equipped with M101Z has both Wireless (b/g/n) & Wired (10/100 Ethernet).

Dell Inspiron M101z Laptop is powered by AMD Athlon II K125 processsor, 2.7 GHz Processor speed with 250 GB Hard disk drive, 2GB RAM, AMD RS880M chipset and 11.6 Inch screen size. It supports Web Camera and Connectivity options like Bluetooth, Wi-Fi, USB Ports, LAN and Genuine Windows 7 Home Premium Operating System.

The style and design of the M101z's structure is set quite thicker than the other line of laptops. This laptop's battery is set integrated into its superb chassis where the battery integration ends up doing the rear of the process measure 1.5 inches thick. This laptop ha also been featured with solid establish that are much better and offer long lasting solutions.

The Inspiron M101Z's is set incorporated with dual-heart processor and are indicated with AMD Neo K325 processor. This is also coupled by 4 GB of RAM and delivers a perfect combination. It has a dual-core processor chip that is concluded as the greatest edition on the benchmarks. This pick from dell laptops has action PC video game such as Kayne and Lynch that is choppy to play.

Edit Photo with PhotoFiltre (Freeware)

PhotoFiltre is a program that is not only free, it's pretty intuitive to use and best of all, one doesn't have to wade through a huge learning curve to use just the 'basics' when altering a photo (although it'll do lots of other magic stuff, too!)

With this, and any photo editing software program, please please always work on a copy of your original photo.

This program has a great little 're-do' feature ... so if you make an change you don't like, simply click Edit>Undo (found along the top, left area of your program screen) - so have fun experimenting!

When Photofiltre program opens on the screen ...

To import a photo
1. Click on FILE (from program's top task bar) >Open
2. Double-click on individual image file to open it on the screen

To adjust the resolution/size
1. Click IMAGE (from program's top task bar) >Image Size ... and from the small window that opens ...
2. Ensure both wee boxes saying 'Preserve aspect' and 'Optimize' remain ticked, and;
3. Change the word 'pixels' to read inches
4. Adjust the control for 'Width' to desired size (this will automatically adjust the height of photo while maintaining the proportions of the original photo).
5. Adjust the 'Resolution' ...
Example:
- For any photo intended to be printed, choose at least 250 pixels/inch
- For any image simply to be used on computer screen or on website, 100 pixels/inch

To auto adjust color/tone of photo

1. Click ADJUST (from program's top task bar)> Auto level (if you don't like the changes, simply click EDIT>Undo
2. Click ADJUST> Auto contrast ( simply click EDIT>Undo if you don't like the change)
(There are lots of adjustments to play with and luckily, the magical Edit>Undo will put things back if you don't like the results).

To make colours brighter in a photo:
- Click FILTER>Colour>Revive Colours

Hint: When wanting to change a photo to black and white, try doing above but rather than choosing 'Revive Colours', choose 'Fade Colours' - and then select 'Gray Scale'. And one follows the same above path to choose 'Tarnish Colours' or 'Gray Scale' etc.

How to Crop a photo
Cropping a picture is the process of simply trimming out unwanted parts of a picture rather like using scissors to trim a real photo and it can make a otherwise ordinary photo into something more interesting. Also, another reason to crop a photo is to make it suit a particular photo frame size, such as 5×7 inch, 8×10 inch or 11×14 inch without distorting the original proportions of the photo.
1. Open a photo within PhotoFiltre
2. Lift-click on photo itself (you'll be creating a 'box' so choose, for example, an outer area yet while ensuring when 'box' is completed, the part of your photo you want to keep is within the box)

Note: Don't worry if it's wrong the first time, simply go up to Edit>Undo

3. Left-click on IMAGE (along top of screen) and from drop-down box ... click CROP
(This will cause the 'unwanted' part of your photo to vanish)
4. Left-click on IMAGE (along top of screen) and from drop-down box ...
5. Click 'IMAGE SIZE'... this will create a new wee box on screen
6. On this new 'Image Size' box ...
- Under New size ... change from pixels to inches
- Width: Set to whatever size you'd like the finished photo to be
- Resolution: Ensure it is set to 250 if the photo is 4x6" or under - really large photos need 300 - 350
- Click OK

Saving newly cropped image:
7. Left-click on FILE and from drop down box, click SAVE AS (this will open a new window on screen)
8. Rename your file unless you are absolutely sure you will never ever want the cropped off part at a later date - the original version, once gone when a file is over-written, it's gone forever.

Adding multiple photos on one sheet of photo paper
1. Open Photo Filtre program ...and along the top, right under the word 'File' is a whitish rectangle ...
2. LEFT-click on whitish rectangle ... this will open another wee window on your screen called 'New'
3. On this new window ...look for words 'New Size' ...
a) Set to 'inches'
b) Adjust Width (for instance, set to 8 1/2" for regular full size photo sheet)
c) Adjust Height (for instance, set to 11" for regular full size photo sheet)
d) Adjust Resolution: Set to 250 (if adding a bunch of smaller photos) OR if adding one large photo, set to 350)
e) Adjust Background: Leave white usually

(Note: On this same new window, one can actually choose 'Preset Size' for your blank page ... for instance, the instant right size for DVD jacket, etc. However, for this tutorial where one entire full size sheet of photo paper will be used, leave at the Preset size of 'Customized').

To Add Multiple Photos to the Blank Page, ready for printing
1. Click File>Open (this is open another little window from which one can navigate to find one's photos within computer)
2. Locate photo(s) ... one can highlight several at one time, if preferred
3. While photo(s) is still highlighted, click Open (now the little box on your screen will close)
4. As each photo arrives on screen ... simply left-click anywhere on a photo and use roller button on mouse to decrease size so each is fully visable on the screen
5. Left-click on one photo ...click Edit (along top of screen) ...click Copy from drop down box
6. Left-click once anywhere on the white 'blank' box you'll be adding photos to
7. Left click Edit (along top of screen) ... click Paste from drop down box.

Note: Don't worry if the multiple photos are sitting on top of themselves as they arrive - please just see below

Adjusting Size of Photos and their Placement on the Blank Page
1. Left-click anywhere on the top photo ... and with your mouse held down simply slide anywhere on the blank page
Do this for each photo
2. To change the size of each photo ...
- Left click on any corner (corner only or photo will loose proportion - but if it happens, simply go up to Edit and click Undo)
- Slide corner out to enlarge or in to shrink size of photo

Note: Just a wee suggestion, but I'd leave a tiny bit of space between each photo when they are finally all arranged - simply to make cutting out a bit easier.

To add text to photo
1. Click on T (this will bring up another wee Text window
2. Choose the font wanted
3. Choose the size of font wanted (note the little Preview window)
4. Click OK (this will transfer words onto the actual photo)
5. To move the printing to another area on the photo, left click on words and hold mouse key down
6. Slide to new position - release mouse

(Note: One can change the size of the words again simply by left-clicking on corner of word 'block' and dragging).

To add frame/border(s) around photo
1. Click IMAGE>Outside frame (this will open a new wee window on the screen)
2. On this new window 'Outside Frame, click on 'Color' to change choice from white, click OK
3. Click on 'Width' to adjust size of the frame
4. Click OK

In this same wee box, to use a textured frame rather than a solid colour, tick 'Background pattern'>Click on the yellow folder icon (this will show all textures available to choose from>choose texture>Click OK).

To save altered image
1. FILE>Save as

There are many options available in this freebie program - and because of the ability to use Edit>Undo, at least one doesn't have to worry about experimenting - have fun!

Printing

1. Left-click on Printer icon along top (second row under the blue strip that says Photo Filtre) - this will open up another wee window
2. On this new wee window ... tick 'Fit to Page' (your page size has already been decided in the above original step when we chose a full size page to work with as our 'blank')
3. Look for the word 'Copies' ... leave it set as 1 copy, if you only want one page printed
4. Click the words 'Setup' ... (this will open your Printer Setup box) ...

On the new Printer Setup box ...
a) Ensure the Paper Size is set to 'Letter'
b) Ensure Orientation is set to Portrait
c) Click on Properties ... this will open up your actual printer properties box ...
- Under Media Type choose 'Glossy Photo Paper'
- Tick 'Preview before Printing'
d) Click OK

Download: PhotoFiltre

Windows 7 Keyboard Shortcuts - Complete List

Keyboard shortcuts are combinations of two or more keys that, when pressed, can be used to perform a task that would typically require a mouse or other pointing device. Keyboard shortcuts can make it easier to interact with your computer, saving you time and effort as you work with Windows and other programs.

Most programs also provide accelerator keys that can make it easier to work with menus and other commands. Check the menus of programs for accelerator keys. If a letter is underlined in a menu, that usually means that pressing the Alt key in combination with the underlined key will have the same effect as clicking that menu item.

You can also create new keyboard shortcuts to open programs. Here is list of most usefull Windows 7 keyboard shortcuts and hostkeys list:

Ease of Access keyboard shortcuts

* Right Shift for eight seconds: Turn Filter Keys on and off
* Left Alt + Left Shift + PrtScn (or PrtScn): Turn High Contrast on or off
* Left Alt + Left Shift + Num Lock: Turn Mouse Keys on or off
* Shift five times: Turn Sticky Keys on or off
* Num Lock for five seconds: Turn Toggle Keys on or off
* Windows logo key + U: Open the Ease of Access Center

General keyboard shortcuts

* F1: Display Help
* Ctrl + C (or Ctrl + Insert): Copy the selected item
* Ctrl + X: Cut the selected item
* Ctrl + V (or Shift + Insert): Paste the selected item
* Ctrl + Z: Undo an action
* Ctrl + Y: Redo an action
* Delete (or Ctrl + D): Delete the selected item and move it to the Recycle Bin
* Shift + Delete: Delete the selected item without moving it to the Recycle Bin first
* F2: Rename the selected item
* Ctrl + Right Arrow: Move the cursor to the beginning of the next word
* Ctrl + Left Arrow: Move the cursor to the beginning of the previous word
* Ctrl + Down Arrow: Move the cursor to the beginning of the next paragraph
* Ctrl + Up Arrow: Move the cursor to the beginning of the previous paragraph
* Ctrl + Shift with an arrow key: Select a block of text
* Shift + any arrow key: Select more than one item in a window or on the desktop, or select text within a document
* Ctrl + any arrow key + Spacebar: Select multiple individual items in a window or on the desktop
* Ctrl + A: Select all items in a document or window
* F3: Search for a file or folder
* Alt + Enter: Display properties for the selected item
* Alt + F4: Close the active item, or exit the active program
* Alt + Spacebar: Open the shortcut menu for the active window
* Ctrl + F4: Close the active document (in programs that allow you to have multiple documents open simultaneously)
* Alt + Tab: Switch between open items
* Ctrl + Alt + Tab: Use the arrow keys to switch between open items
* Ctrl + Mouse scroll wheel: Change the size of icons on the desktop
* Windows logo key + Tab: Cycle through programs on the taskbar by using Aero Flip 3-D
* Ctrl+ Windows logo key + Tab: Use the arrow keys to cycle through programs on the taskbar by using Aero Flip 3-D
* Alt + Esc: Cycle through items in the order in which they were opened
* F6: Cycle through screen elements in a window or on the desktop
* F4: Display the address bar list in Windows Explorer
* Shift + F10: Display the shortcut menu for the selected item
* Ctrl + Esc: Open the Start menu
* Alt + underlined letter: Display the corresponding menu
* Alt + underlined letter: Perform the menu command (or other underlined command)
* F10: Activate the menu bar in the active program
* Right Arrow: Open the next menu to the right, or open a submenu
* Left Arrow: Open the next menu to the left, or close a submenu
* F5 (or Ctrl + R): Refresh the active window
* Alt + Up Arrow: View the folder one level up in Windows Explorer
* Esc: Cancel the current task
* Ctrl + Shift + Esc: Open Task Manager
* Shift when you insert a CD: Prevent the CD from automatically playing
* Left Alt + Shift: Switch the input language when multiple input languages are enabled
* Ctrl + ShiftL: Switch the keyboard layout when multiple keyboard layouts are enabled
* Right or Left Ctrl + Shift: Change the reading direction of text in right-to-left reading languages

Dialog box keyboard shortcuts

* Ctrl + Tab: Move forward through tabs
* Ctrl + Shift + Tab: Move back through tabs
* Tab: Move forward through options
* Shift + Tab: Move back through options
* Alt + underlined letter: Perform the command (or select the option) that goes with that letter
* Enter: Replaces clicking the mouse for many selected commands
* Spacebar: Select or clear the check box if the active option is a check box
* Arrow keys: Select a button if the active option is a group of option buttons
* F1: Display Help
* F4: Display the items in the active list
* Backspace: Open a folder one level up if a folder is selected in the Save As or Open dialog box

Windows logo key keyboard shortcuts

* Windows logo key: Open or close the Start menu.
* Windows logo key + Pause: Display the System Properties dialog box.
* Windows logo key + D: Display the desktop.
* Windows logo key + M: Minimize all windows.
* Windows logo key + Shift + M: Restore minimized windows to the desktop.
* Windows logo key + E: Open Computer.
* Windows logo key + F: Search for a file or folder.
* Ctrl + Windows logo key + F: Search for computers (if you’re on a network).
* Windows logo key + L: Lock your computer or switch users.
* Windows logo key + R: Open the Run dialog box.
* Windows logo key + T: Cycle through programs on the taskbar.
* Windows logo key + number: Start the program pinned to the taskbar in the position indicated by the number. If the program is already running, switch to that program.
* Shift + Windows logo key + number: Start a new instance of the program pinned to the taskbar in the position indicated by the number.
* Ctrl + Windows logo key + number: Switch to the last active window of the program pinned to the taskbar in the position indicated by the number.
* Alt + Windows logo key + number: Open the Jump List for the program pinned to the taskbar in the position indicated by the number.
* Windows logo key + Tab: Cycle through programs on the taskbar by using Aero Flip 3-D.
* Ctrl+Windows logo key + Tab: Use the arrow keys to cycle through programs on the taskbar by using Aero Flip 3-D.
* Ctrl+Windows logo key + B: Switch to the program that displayed a message in the notification area.
* Windows logo key + Spacebar: Preview the desktop.
* Windows logo key + Up Arrow: Maximize the window.
* Windows logo key + Left Arrow: Maximize the window to the left side of the screen.
* Windows logo key + Right Arrow: Maximize the window to the right side of the screen.
* Windows logo key + Down Arrow: Minimize the window.
* Windows logo key + Home: Minimize all but the active window.
* Windows logo key + Shift + Up Arrow: Stretch the window to the top and bottom of the screen.
* Windows logo key + Shift+ Left Arrow or Right Arrow: Move a window from one monitor to another.
* Windows logo key + P: Choose a presentation display mode.
* Windows logo key + G: Cycle through gadgets.
* Windows logo key + U: Open Ease of Access Center.
* Windows logo key + X: Open Windows Mobility Center.

Windows Explorer keyboard shortcuts

* Ctrl + N: Open a new window
* Ctrl + W: Close the current window
* Ctrl + Shift + N: Create a new folder
* End: Display the bottom of the active window
* Home: Display the top of the active window
* F11: Maximize or minimize the active window
* Ctrl + Period (.): Rotate a picture clockwise
* Ctrl + Comma (,): Rotate a picture counter-clockwise
* Num Lock + Asterisk (*) on numeric keypad: Display all subfolders under the selected folder
* Num Lock + Plus Sign (+) on numeric keypad: Display the contents of the selected folder
* Num Lock + Minus Sign (-) on numeric keypad: Collapse the selected folder
* Left Arrow: Collapse the current selection (if it’s expanded), or select the parent folder
* Alt + Enter: Open the Properties dialog box for the selected item
* Alt + P: Display the preview pane
* Alt + Left Arrow: View the previous folder
* Backspace: View the previous folder
* Right Arrow: Display the current selection (if it’s collapsed), or select the first subfolder
* Alt + Right Arrow: View the next folder
* Alt + Up Arrow: View the parent folder
* Ctrl + Shift + E: Display all folders above the selected folder
* Ctrl + Mouse scroll wheel: Change the size and appearance of file and folder icons
* Alt + D: Select the address bar
* Ctrl + E: Select the search box
* Ctrl + F: Select the search box

Taskbar keyboard shortcuts

* Shift + Click on a taskbar button: Open a program or quickly open another instance of a program
* Ctrl + Shift + Click on a taskbar button: Open a program as an administrator
* Shift + Right-click on a taskbar button: Show the window menu for the program
* Shift + Right-click on a grouped taskbar button: Show the window menu for the group
* Ctrl + Click on a grouped taskbar button: Cycle through the windows of the group

Magnifier keyboard shortcuts

* Windows logo key + Plus Sign or Minus Sign: Zoom in or out
* Ctrl + Alt + Spacebar: Preview the desktop in full-screen mode
* Ctrl + Alt + F: Switch to full-screen mode
* Ctrl + Alt + L: Switch to lens mode
* Ctrl + Alt + D: Switch to docked mode
* Ctrl + Alt + I: Invert colors
* Ctrl + Alt + arrow keys: Pan in the direction of the arrow keys
* Ctrl + Alt + R: Resize the lens
* Windows logo key + Esc: Exit Magnifier

Remote Desktop Connection keyboard shortcuts

* Alt + Page Up: Move between programs from left to right.
* Alt + Page Down: Move between programs from right to left.
* Alt + Insert: Cycle through programs in the order that they were started in.
* Alt + Home: Display the Start menu.
* Ctrl + Alt + Break: Switch between a window and full screen.
* Ctrl + Alt + End: Display the Windows Security dialog box.
* Alt + Delete: Display the system menu.
* Ctrl + Alt + Minus Sign (-) on the numeric keypad: Place a copy of the active window, within the client, on the Terminal server clipboard (provides the same functionality as pressing Alt + PrtScn on a local computer).
* Ctrl + Alt + Plus Sign (+) on the numeric keypad: Place a copy of the entire client window area on the Terminal server clipboard (provides the same functionality as pressing PrtScn on a local computer).
* Ctrl + Alt + Right Arrow: “Tab” out of the Remote Desktop controls to a control in the host program (for example, a button or a text box). Useful when the Remote Desktop controls are embedded in another (host) program.
* Ctrl + Alt + Left Arrow: “Tab” out of the Remote Desktop controls to a control in the host program (for example, a button or a text box). Useful when the Remote Desktop controls are embedded in another (host) program.

Paint keyboard shortcuts

* Ctrl + N: Create a new picture
* Ctrl + O: Open an existing picture
* Ctrl + S: Save changes to a picture
* F12: Save the picture as a new file
* Ctrl + P: Print a picture
* Alt + F4: Close a picture and its Paint window
* Ctrl + Z: Undo a change
* Ctrl + Y: Redo a change
* Ctrl + A: Select the entire picture
* Ctrl + X: Cut a selection
* Ctrl + C: Copy a selection to the Clipboard
* Ctrl + V: Paste a selection from the Clipboard
* Right Arrow: Move the selection or active shape right by one pixel
* Left Arrow: Move the selection or active shape left by one pixel
* Down Arrow: Move the selection or active shape down by one pixel
* Up Arrow: Move the selection or active shape up by one pixel
* Esc: Cancel a selection
* Delete: Delete a selection
* Ctrl + B: Bold selected text
* Ctrl + +: Increase the width of a brush, line, or shape outline by one pixel
* Ctrl + -: Decrease the width of a brush, line, or shape outline by one pixel
* Ctrl + I: Italicize selected text
* Ctrl + U: Underline selected text
* Ctrl + E: Open the Properties dialog box
* Ctrl + W: Open the Resize and Skew dialog box
* Ctrl + Page Up: Zoom in
* Ctrl + Page Down: Zoom out
* F11: View a picture in full-screen mode
* Ctrl + R: Show or hide the ruler
* Ctrl + G: Show or hide gridlines
* F10 or Alt: Display keytips
* Shift + F10: Show the current shortcut menu
* F1: Open Paint Help

WordPad keyboard shortcuts

* Ctrl + N: Create a new document
* Ctrl + O: Open an existing document
* Ctrl + S: Save changes to a document
* F12: Save the document as a new file
* Ctrl + P: Print a document
* Alt + F4: Close WordPad
* Ctrl + Z: Undo a change
* Ctrl + Y: Redo a change
* Ctrl + A: Select the entire document
* Ctrl + X: Cut a selection
* Ctrl + C: Copy a selection to the Clipboard
* Ctrl + V: Paste a selection from the Clipboard
* Ctrl + B: Make selected text bold
* Ctrl + I: Italicize selected text
* Ctrl + U: Underline selected text
* Ctrl + =: Make selected text subscript
* Ctrl + Shift + =: Make selected text superscript
* Ctrl + L: Align text left
* Ctrl + E Align text center
* Ctrl + R:: Align text right
* Ctrl + J: Justify text
* Ctrl + 1: Set single line spacing
* Ctrl + 2: Set double line spacing
* Ctrl + 5: Set line spacing to 1.5
* Ctrl + Shift + >: Increase the font size
* Ctrl + Shift + <: Decrease the font size
* Ctrl + Shift + A: Change characters to all capitals
* Ctrl + Shift + L: Change the bullet style
* Ctrl + D: Insert a Microsoft Paint drawing
* Ctrl + F: Find text in a document
* F3: Find the next instance of the text in the Find dialog box
* Ctrl + H: Replace text in a document
* Ctrl + Left Arrow: Move the cursor one word to the left
* Ctrl + Right Arrow: Move the cursor one word to the right
* Ctrl + Up Arrow: Move the cursor to the line above
* Ctrl + Down Arrow: Move the cursor to the line below
* Ctrl + Home: Move to the beginning of the document
* Ctrl + End: Move to the end of the document
* Ctrl + Page Up: Move up one page
* Ctrl + Page Down: Move down one page
* Ctrl + Delete: Delete the next word
* F10: Display keytips
* Shift + F10: Show the current shortcut menu
* F1: Open WordPad Help

Calculator keyboard shortcuts

* Alt + 1: Switch to Standard mode
* Alt + 2: Switch to Scientific mode
* Alt + 3: Switch to Programmer mode
* Alt + 4: Switch to Statistics mode
* Ctrl + E: Open date calculations
* Ctrl + H: Turn calculation history on or off
* Ctrl + U: Open unit conversion
* Alt + C: Calculate or solve date calculations and worksheets
* F1: Open Calculator Help
* Ctrl + Q: Press the M- button
* Ctrl + P: Press the M+ button
* Ctrl + M: Press the MS button
* Ctrl + R: Press the MR button
* Ctrl + L: Press the MC button
* %: Press the % button
* F9: Press the +/– button
* /: Press the / button
* *: Press the * button
* +: Press the + button
* -: Press the – button
* R: Press the 1/× button
* @: Press the square root button
* 0-9: Press the number buttons (0-9)
* =: Press the = button
* .: Press the . (decimal point) button
* Backspace: Press the backspace button
* Esc: Press the C button
* Del: Press the CE button
* Ctrl + Shift + D: Clear the calculation history
* F2: Edit the calculation history
* Up Arrow key: Navigate up in the calculation history
* Down Arrow key: Navigate down in the calculation history
* Esc: Cancel editing the calculation history
* Enter: Recalculate the calculation history after editing
* F3: Select Degrees in Scientific mode
* F4: Select Radians in Scientific mode
* F5: Select Grads in Scientific mode
* I: Press the Inv button in Scientific mode
* D: Press the Mod button in Scientific mode
* Ctrl + S: Press the sinh button in Scientific mode
* Ctrl + O: Press the cosh button in Scientific mode
* Ctrl + T: Press the tanh button in Scientific mode
* (: Press the ( button in Scientific mode
* ): Press the ) button in Scientific mode
* N: Press the ln button in Scientific mode
* ;: Press the Int button in Scientific mode
* S: Press the sin button in Scientific mode
* O: Press the cos button in Scientific mode
* T: Press the tan button in Scientific mode
* M: Press the dms button in Scientific mode
* P: Press the pi button in Scientific mode
* V: Press the F-E button in Scientific mode
* X: Press the Exp button in Scientific mode
* Q: Press the x^2 button in Scientific mode
* Y: Press the x^y button in Scientific mode
* #: Press the x^3 button in Scientific mode
* L: Press the log button in Scientific mode
* !: Press the n! button in Scientific mode
* Ctrl + Y: Press the y?x button in Scientific mode
* Ctrl + B: Press the 3?x button in Scientific mode
* Ctrl + G: Press the 10x button in Scientific mode
* F5: Select Hex in Programmer mode
* F6: Select Dec in Programmer mode
* F7: Select Oct in Programmer mode
* F8: Select Bin in Programmer mode
* F12: Select Qword in Programmer mode
* F2: Select Dword in Programmer mode
* F3: Select Word in Programmer mode
* F4: Select Byte in Programmer mode
* K: Press the RoR button in Programmer mode
* J: Press the RoL button in Programmer mode
* <: Press the Lsh button in Programmer mode
* >: Press the Rsh button in Programmer mode
* %: Press the Mod button in Programmer mode
* (: Press the ( button in Programmer mode
* ): Press the ) button in Programmer mode
* |: Press the Or button in Programmer mode
* ^: Press the Xor button in Programmer mode
* ~: Press the Not button in Programmer mode
* &: Press the And button in Programmer mode
* A-F: Press the A-F buttons in Programmer mode
* Spacebar: Toggles the bit value in Programmer mode
* A: Press the Average button in Statistics mode
* Ctrl + A: Press the Average Sq button in Statistics mode
* S: Press the Sum button in Statistics mode
* Ctrl + S: Press the Sum Sq button in Statistics mode
* T: Press the S.D. button in Statistics mode
* Ctrl + T: Press the Inv S.D. button in Statistics mode
* D: Press the CAD button in Statistics mode

Windows Journal keyboard shortcuts

* Ctrl + N: Start a new note
* Ctrl + O: Open a recently used note
* Ctrl + S: Save changes to a note
* Ctrl + Shift + V: Move a note to a specific folder
* Ctrl + P: Print a note
* Alt + F4: Close a note and its Journal window
* Ctrl + Z: Undo a change
* Ctrl + Y: Redo a change
* Ctrl + A: Select all items on a page
* Ctrl + X: Cut a selection
* Ctrl + C: Copy a selection to the Clipboard
* Ctrl + V: Paste a selection from the Clipboard
* Esc: Cancel a selection
* Delete: Delete a selection
* Ctrl + F: Start a basic find
* Ctrl + G: Go to a page
* F5: Refresh find results
* F5: Refresh the note list
* F6: Toggle between a note list and a note
* Ctrl + Shift + C: Display a shortcut menu for column headings in a note list
* F11: View a note in full-screen mode
* F1: Open Journal Help

Windows Help viewer keyboard shortcuts

* Alt + C: Display the Table of Contents
* Alt + N: Display the Connection Settings menu
* F10: Display the Options menu
* Alt + Left Arrow: Move back to the previously viewed topic
* Alt + Right Arrow: Move forward to the next (previously viewed) topic
* Alt + A: Display the customer support page
* Alt + Home: Display the Help and Support home page
* Home: Move to the beginning of a topic
* End: Move to the end of a topic
* Ctrl + F: Search the current topic
* Ctrl + P: Print a topic
* F3: Move the cursor to the searchbox

Download FotoMix 8.2

FotoMix enables you to mix and blend pictures to achieve greenscreen/bluescreen effects. It allows you to blend a person or object from one photo into another background by simply painting over the areas you want to become transparent and then inserting the object into a new background. You can also use the software to remove or replace backgrounds, create photo collages, blend multiple images into one, and for many other fun projects.

Once you have created the initial composition, you can fine-tune it with a variety of effect brushes and adjustments that allow you to smooth and blend edges, apply tint, adjust colors and more. You can get even more creative with the help of several artistic tools that let you deform the subject (caricature effects), add text overlays and apply image filters to achieve a unique result. FotoMix is easy to use and other than some creative inspiration, it does not require any graphic editing skills. The result can be saved as project file or exported as JPG image.

Programm feautures:
- FotoMix allows you to mix and manipulate different backgrounds and foregrounds, to create a wide variety of images
- making the design eye-catching photo collages, desktop wallpapers, CD and DVD covers and Web graphics.
- adding or removing your loved and not so loved ones to or from your pictures.
- easily remove, add or alter backgrounds.
- creating of photo montages by combining multiple pictures into a unique heirloom depicting retrospectives of a birth, marriage, anniversary, etc.
There were also added demo images containing demonstration of programm's work principles.

Download: FotoMix 8.2 + Portable

Waiting for Firefox 5 Release in June

Mozilla has set an aggressive schedule for the next version of Firefox, slating the release of Firefox 5 for June 21.

If it meets that schedule, Mozilla could crank out Firefox 6 just two months later.
Firefox 4, for example, was in development for over a year, while Firefox 3.6 took about the same amount of time to finish.

Google uses a similar process to continually feed features to Chrome (Dell inspiron 1501 batteries), relying on a four-channel line of development: nightly, dev, beta and stable.

According to information posted on Mozilla's site , its new, faster development will match Google's.

Mozilla is currently planning a truncated schedule for Firefox 5, which should ship June 21. To meet that deadline, Firefox 5 has to hit the "aurora" channel April 12 and reach beta by May 17.

With Firefox 5 done, Mozilla will shift to a standard 18-week schedule that will put Firefox 6's release around mid-August.

To meet those dates, Mozilla will add features to Firefox as it goes.

Mozilla will apparently also stop shipping interim security updates as of Firefox 5, and instead patch vulnerabilities as fixes are crafted, with the final Firefox build given priority.

The only exception will be emergency security updates, which Mozilla calls "chemspills." Ideally, Mozilla's new plan will update the beta channel every week, the nightly and aurora channels every day, and the Firefox build every six weeks.
Mozilla has worked on silent updating on and off for months. Originally slated to ship with Firefox 4 , the feature was pulled from that version last fall.

Al Hilwa, an analyst with IDC, has praised Mozilla's more frequent release plans for Firefox, which he saw as a reaction to Chrome's rapid schedule.